
Talking to your agents
Hold the talk key and speak. When you let go, SimpleEdit writes down what you said and puts it where your cursor is: in a text field, in an edit box over a terminal, or in a new comment in the Review Room.
Voice never sends anything on its own. You read the text first, then you send it.
Speech is turned into text on your computer by whisper.cpp. The audio is deleted as soon as the text is ready.
1. Set up whisper.cpp
Open Settings → Voice. The Transcription section shows whether whisper.cpp is installed and which model it uses. You need both.
The quick way: select Set up with an agent at the top of the pane. It starts an agent session in your last project window. The agent installs whisper.cpp in your terminal and downloads a model once you agree. Then it proposes the model for SimpleEdit to use, and you approve it. After that, it asks you to try it out: click into a text field or a terminal, hold the talk key and say a sentence. If your language comes out wrong, it offers a larger model that understands more languages. It ends by telling you how to remove whisper.cpp again.
The manual way:
- Install whisper.cpp. On a Mac,
brew install whisper-cppdoes it. SimpleEdit looks for thewhisper-clicommand. - Download a model file.
- Select Choose model… and pick the file. Select Re-check if you installed whisper.cpp while the pane was open.
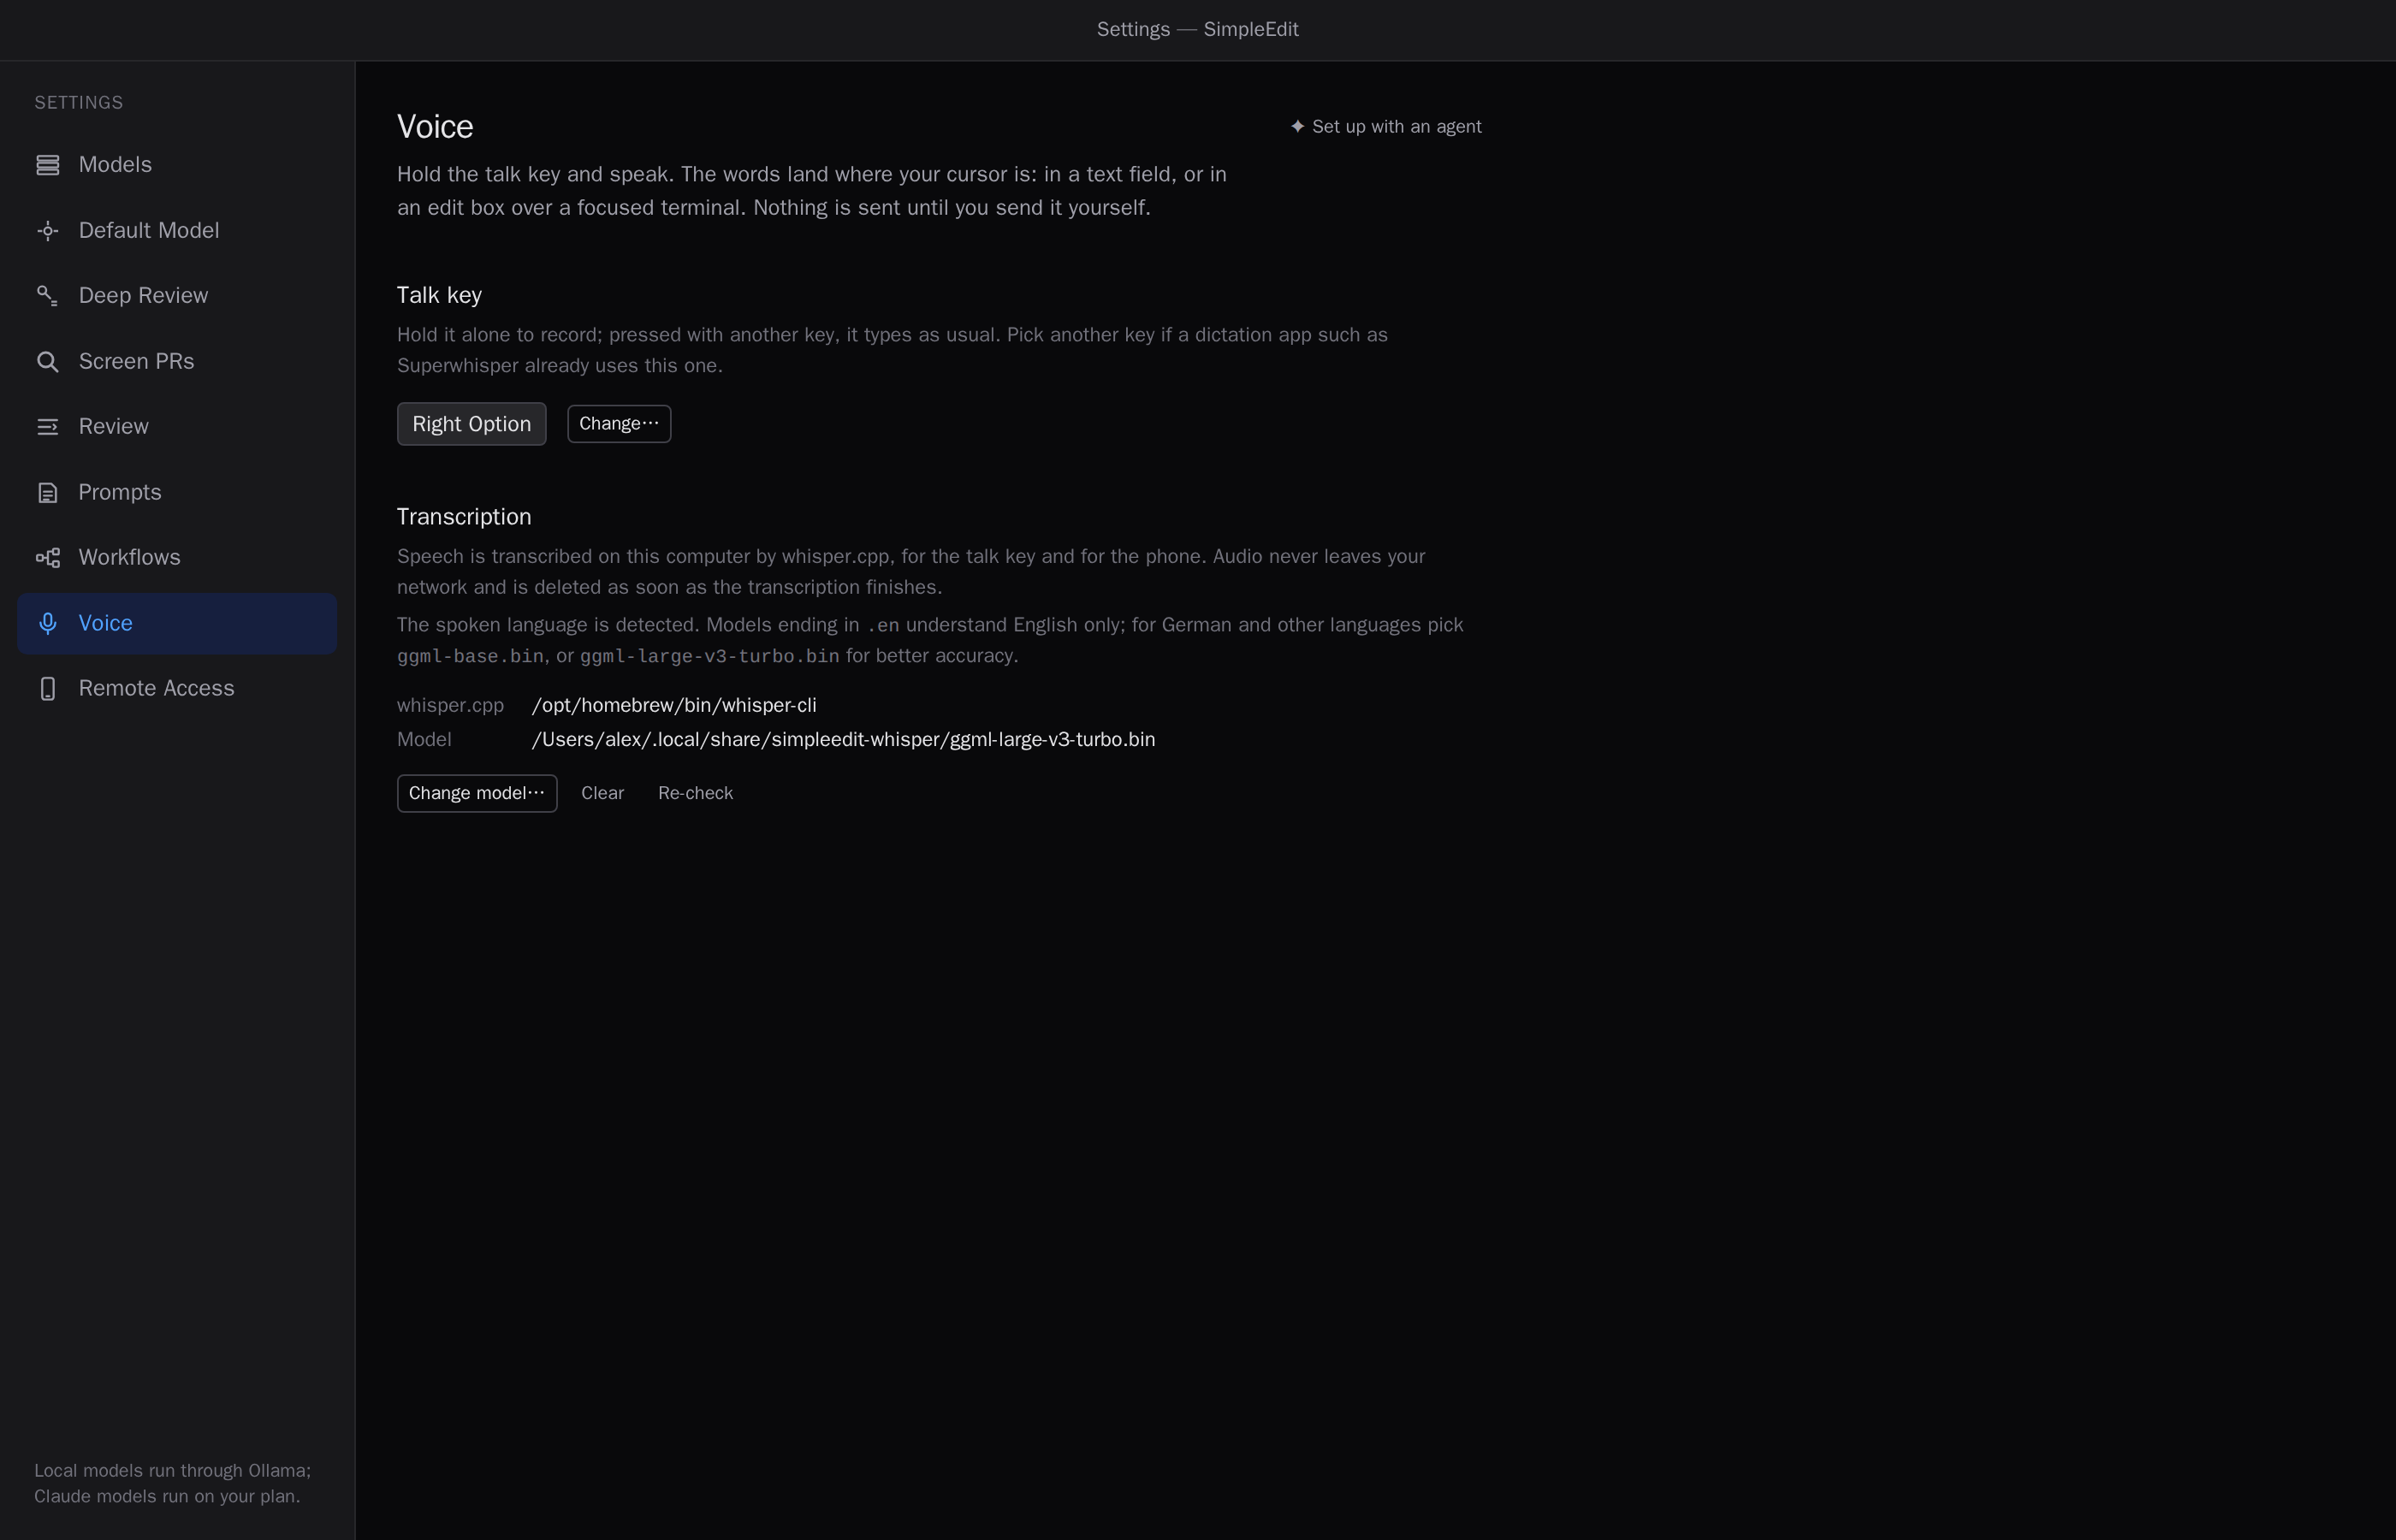
Pick a model that understands your language. SimpleEdit detects the language you speak. Models whose name ends in .en understand English only. For German and other languages, use ggml-base.bin, or ggml-large-v3-turbo.bin for better accuracy.
The phone uses the same setup. See Your agents on your phone.
The first time you record on a Mac, macOS asks whether SimpleEdit may use the microphone. If you said no, allow it in System Settings → Privacy & Security → Microphone.
2. Hold the talk key
The talk key is Right Option on a Mac and Right Alt on Windows and Linux.
- Click where the text should go.
- Hold the talk key, on its own, and speak. A small bar at the bottom of the window says Listening and where the text will go.
- Let go. The bar says Transcribing, and then the text appears.
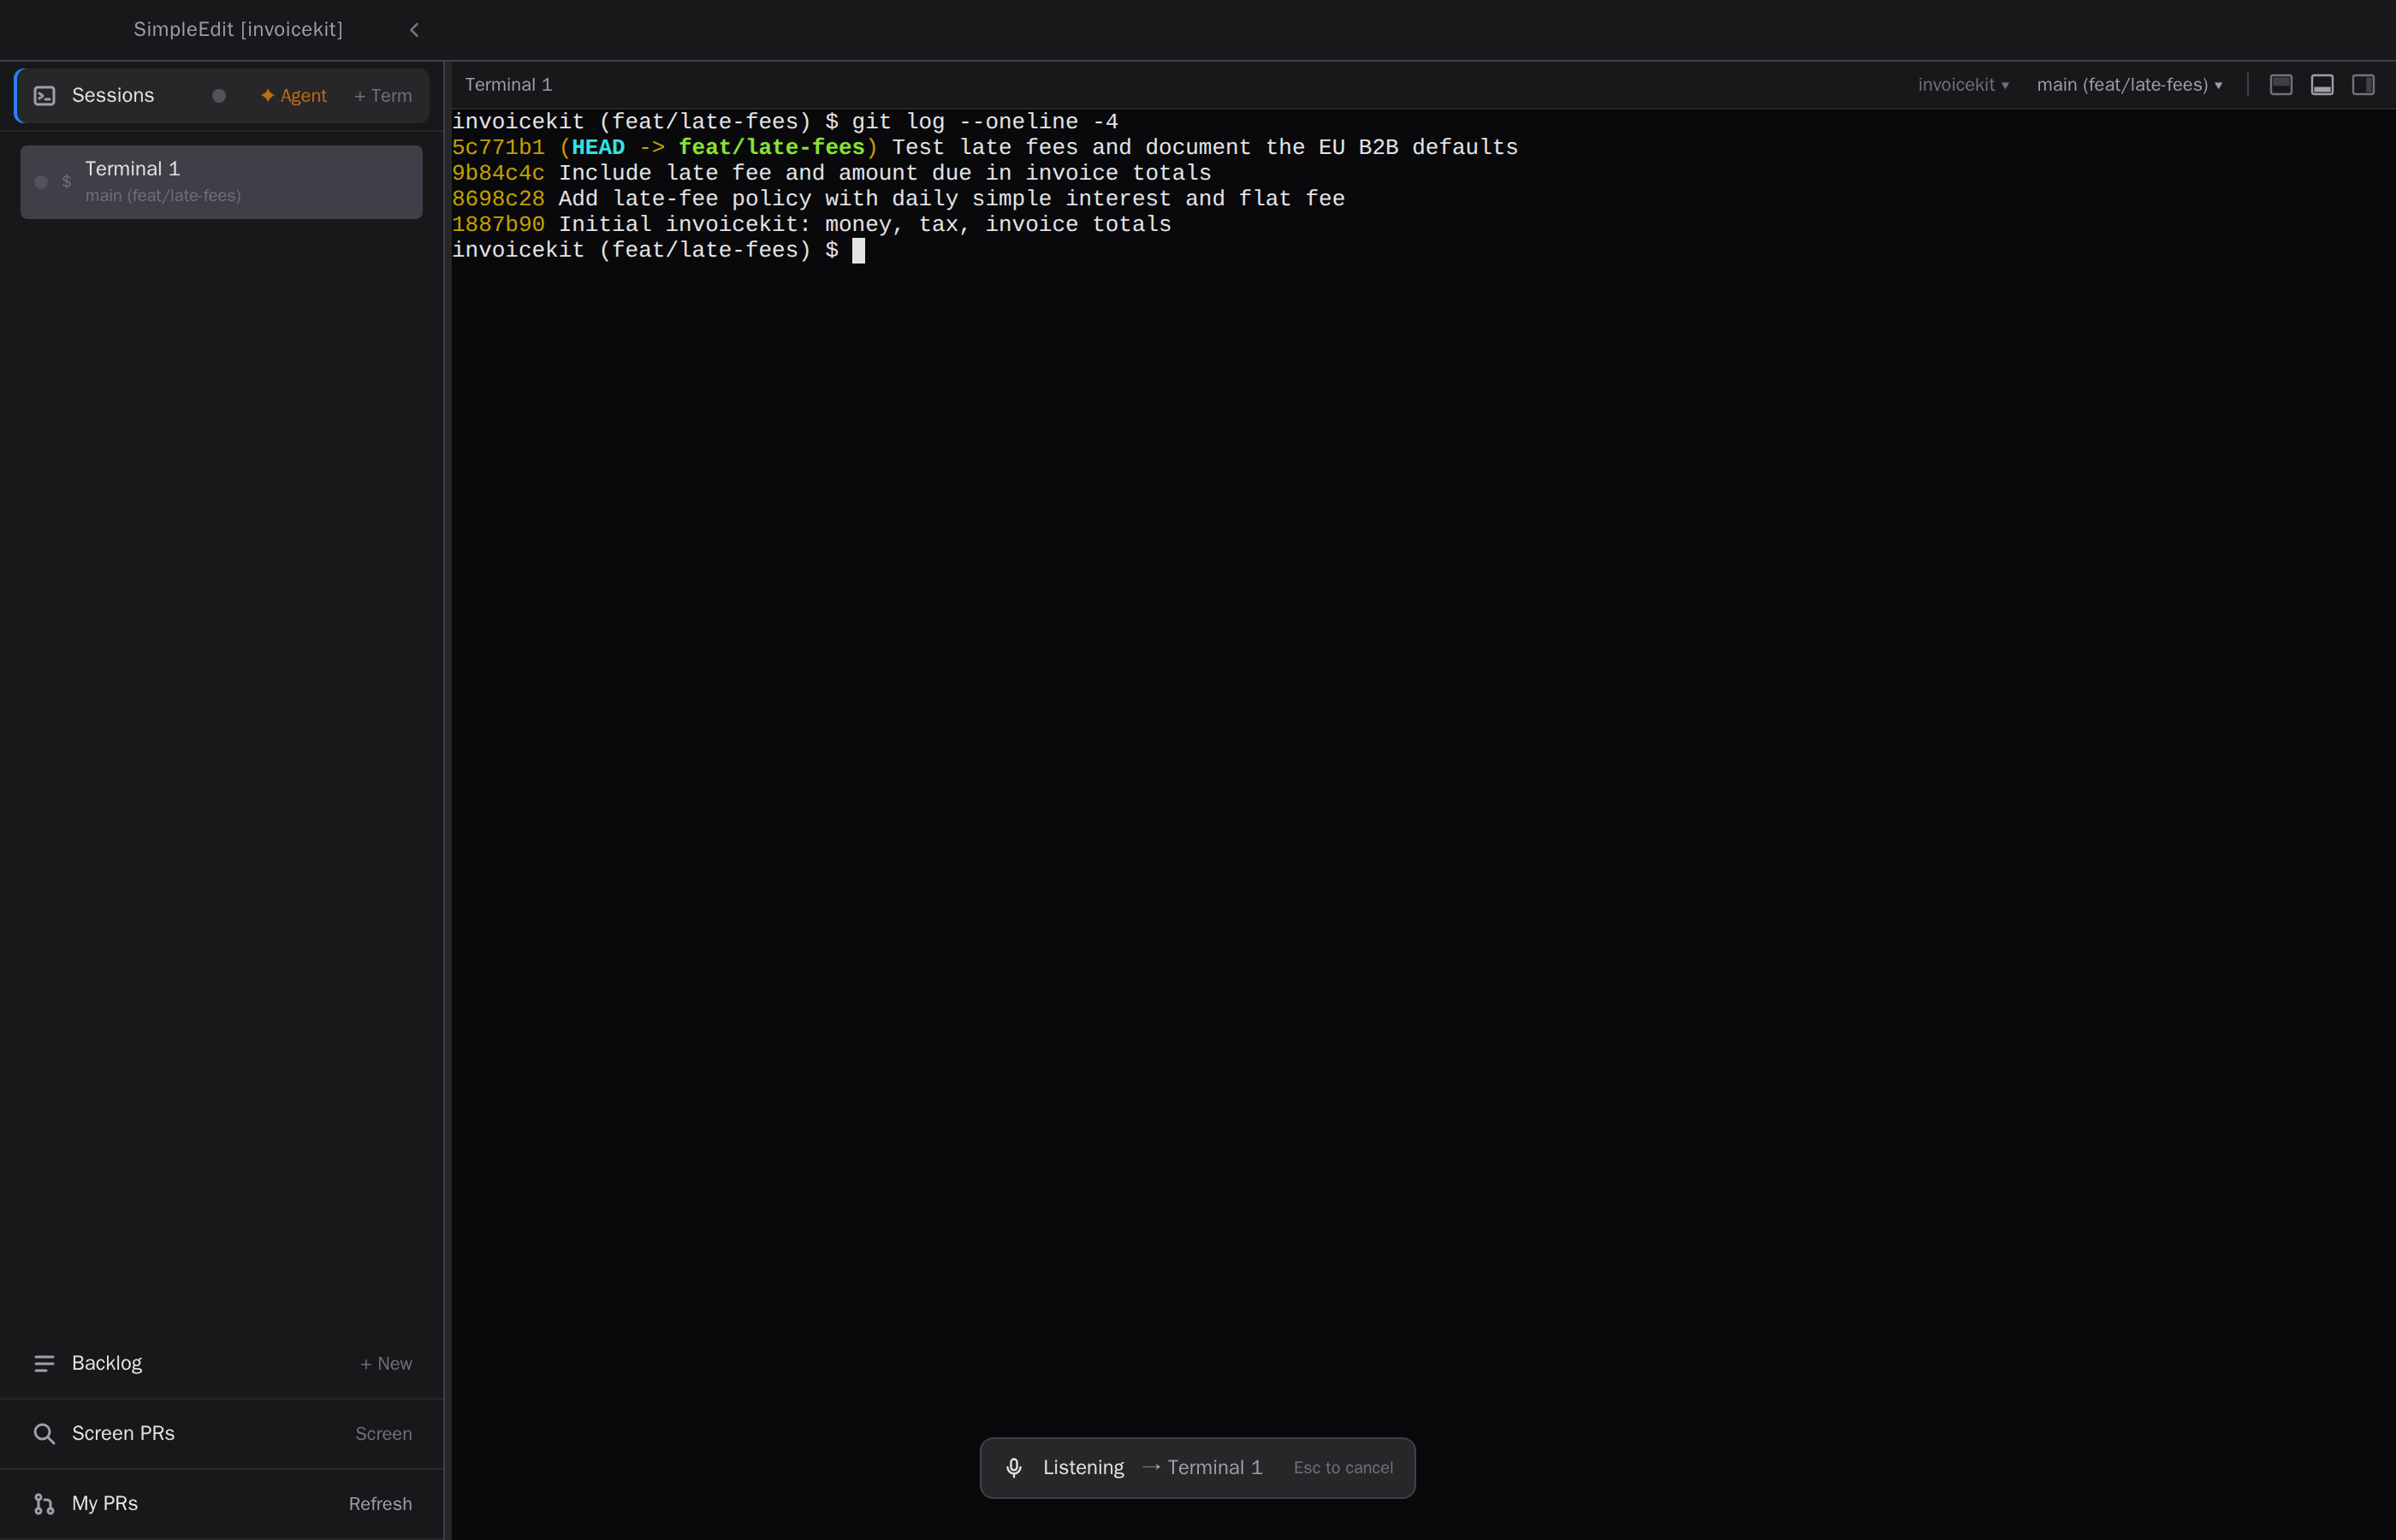
A recording starts only when you hold the key for a moment with no other key. Press the key together with another key and it types as usual, so Option and AltGr characters such as @, [ and ] still work. A quick tap does nothing.
Press Esc while you speak to throw the recording away. A recording stops by itself after two minutes.
You can speak in several chunks. Press the key again while the last chunk is still being transcribed. Nothing is lost.
Change the talk key
In Settings → Voice, select Change… next to the key and press the key you want. A modifier key or a function key works. Keys that type a character, or that you need for editing (Enter, Tab, Esc, the arrows), can’t be the talk key.
Change it if another dictation app, such as Superwhisper, already uses that key. Use Right Option (or Use Right Alt) brings back the default.
3. Where your words go
What has focus when you press the key decides where the text goes.
A text field
The text goes in at the cursor, as if you had typed it. This works in every text field: the ⌘I composer, comment and reply boxes, the backlog prompt and the rest. Edit it, then send it as you normally would.
A terminal
Speaking into a terminal opens an edit box over the bottom of it, headed Dictated for ‹terminal›. Read and fix the text there, then:
- Enter sends it to the agent, as if you had typed it and pressed Enter.
- ⌘Enter (Ctrl+Enter on Windows and Linux) only pastes it at the agent’s prompt, so you can keep editing there.
- Shift+Enter starts a new line.
- Esc throws it away.
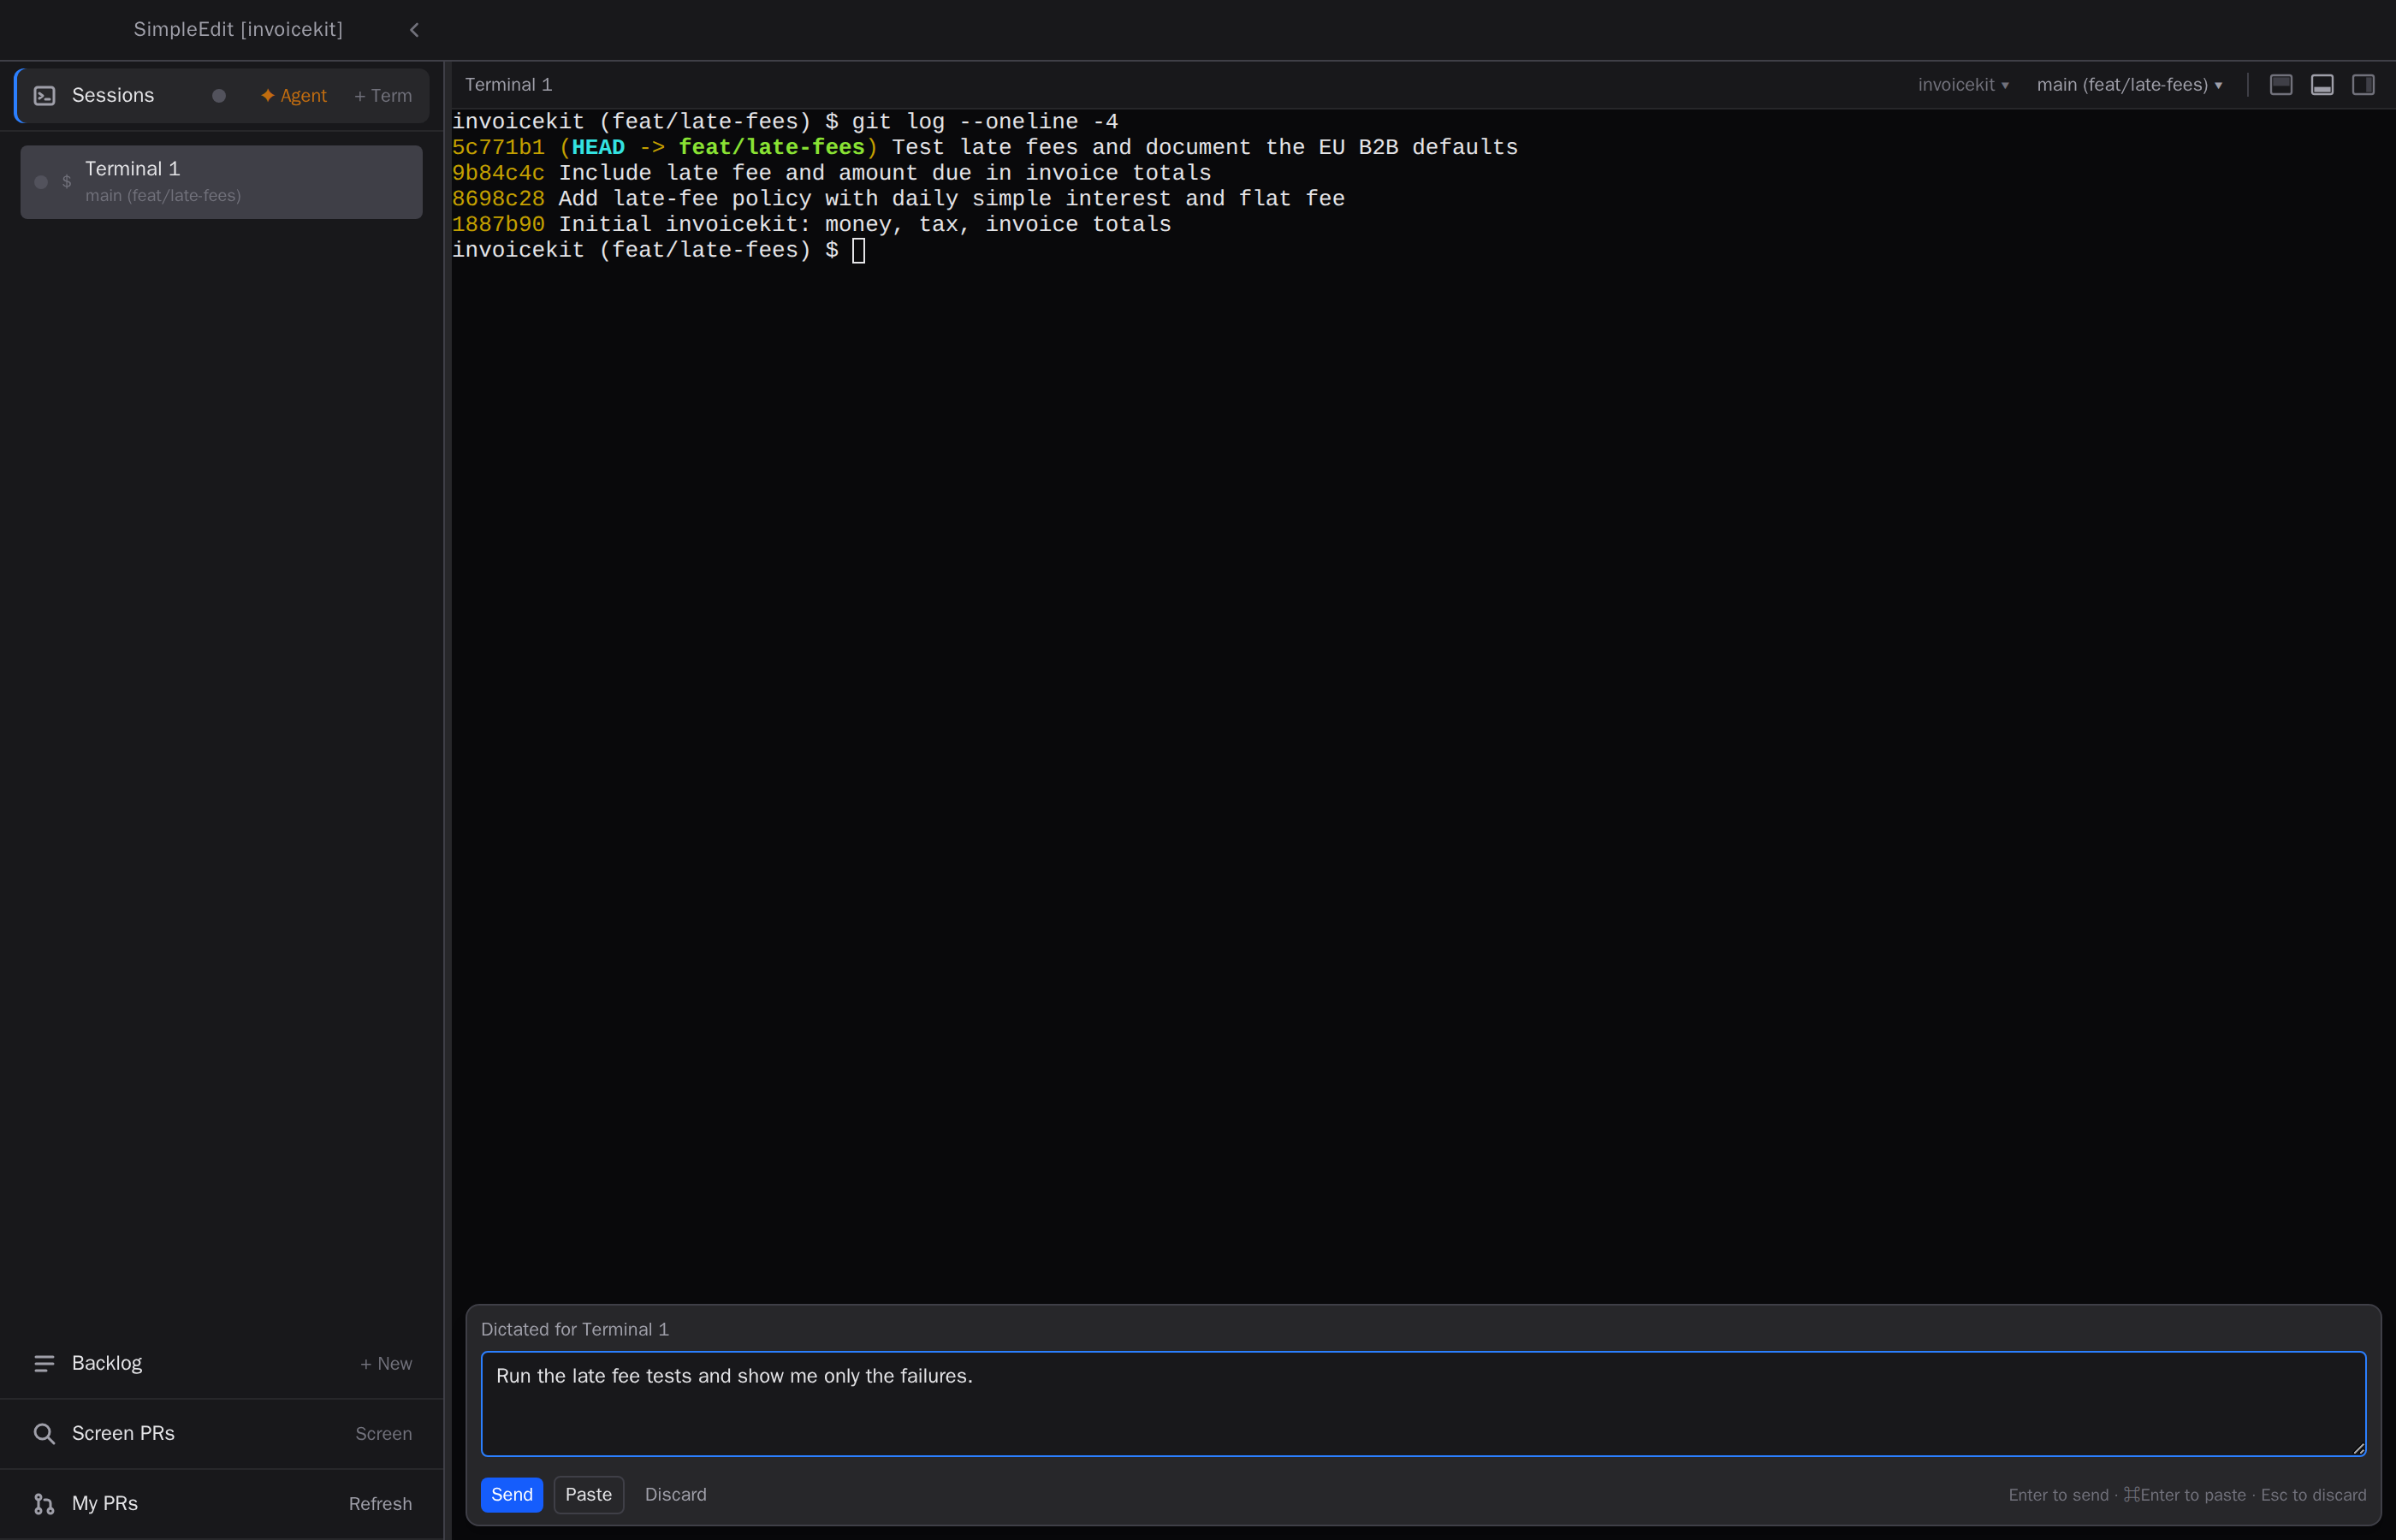
The Send, Paste and Discard buttons do the same. Speak again while the box is open to add to it. Each terminal keeps its own box, so dictating into another session leaves an unsent box alone.
Nothing
If nothing that takes text has focus, the bar shows what you said with a Copy button. The text is never lost: if its field disappears while it is being transcribed, it shows up here too.
4. Speak a comment in the Review Room
In a Review Room, with no text field focused, what you say becomes a comment on the code. Point at a line with the mouse, or select some lines, and say what you think: “Is this right? The limit should be inclusive.”
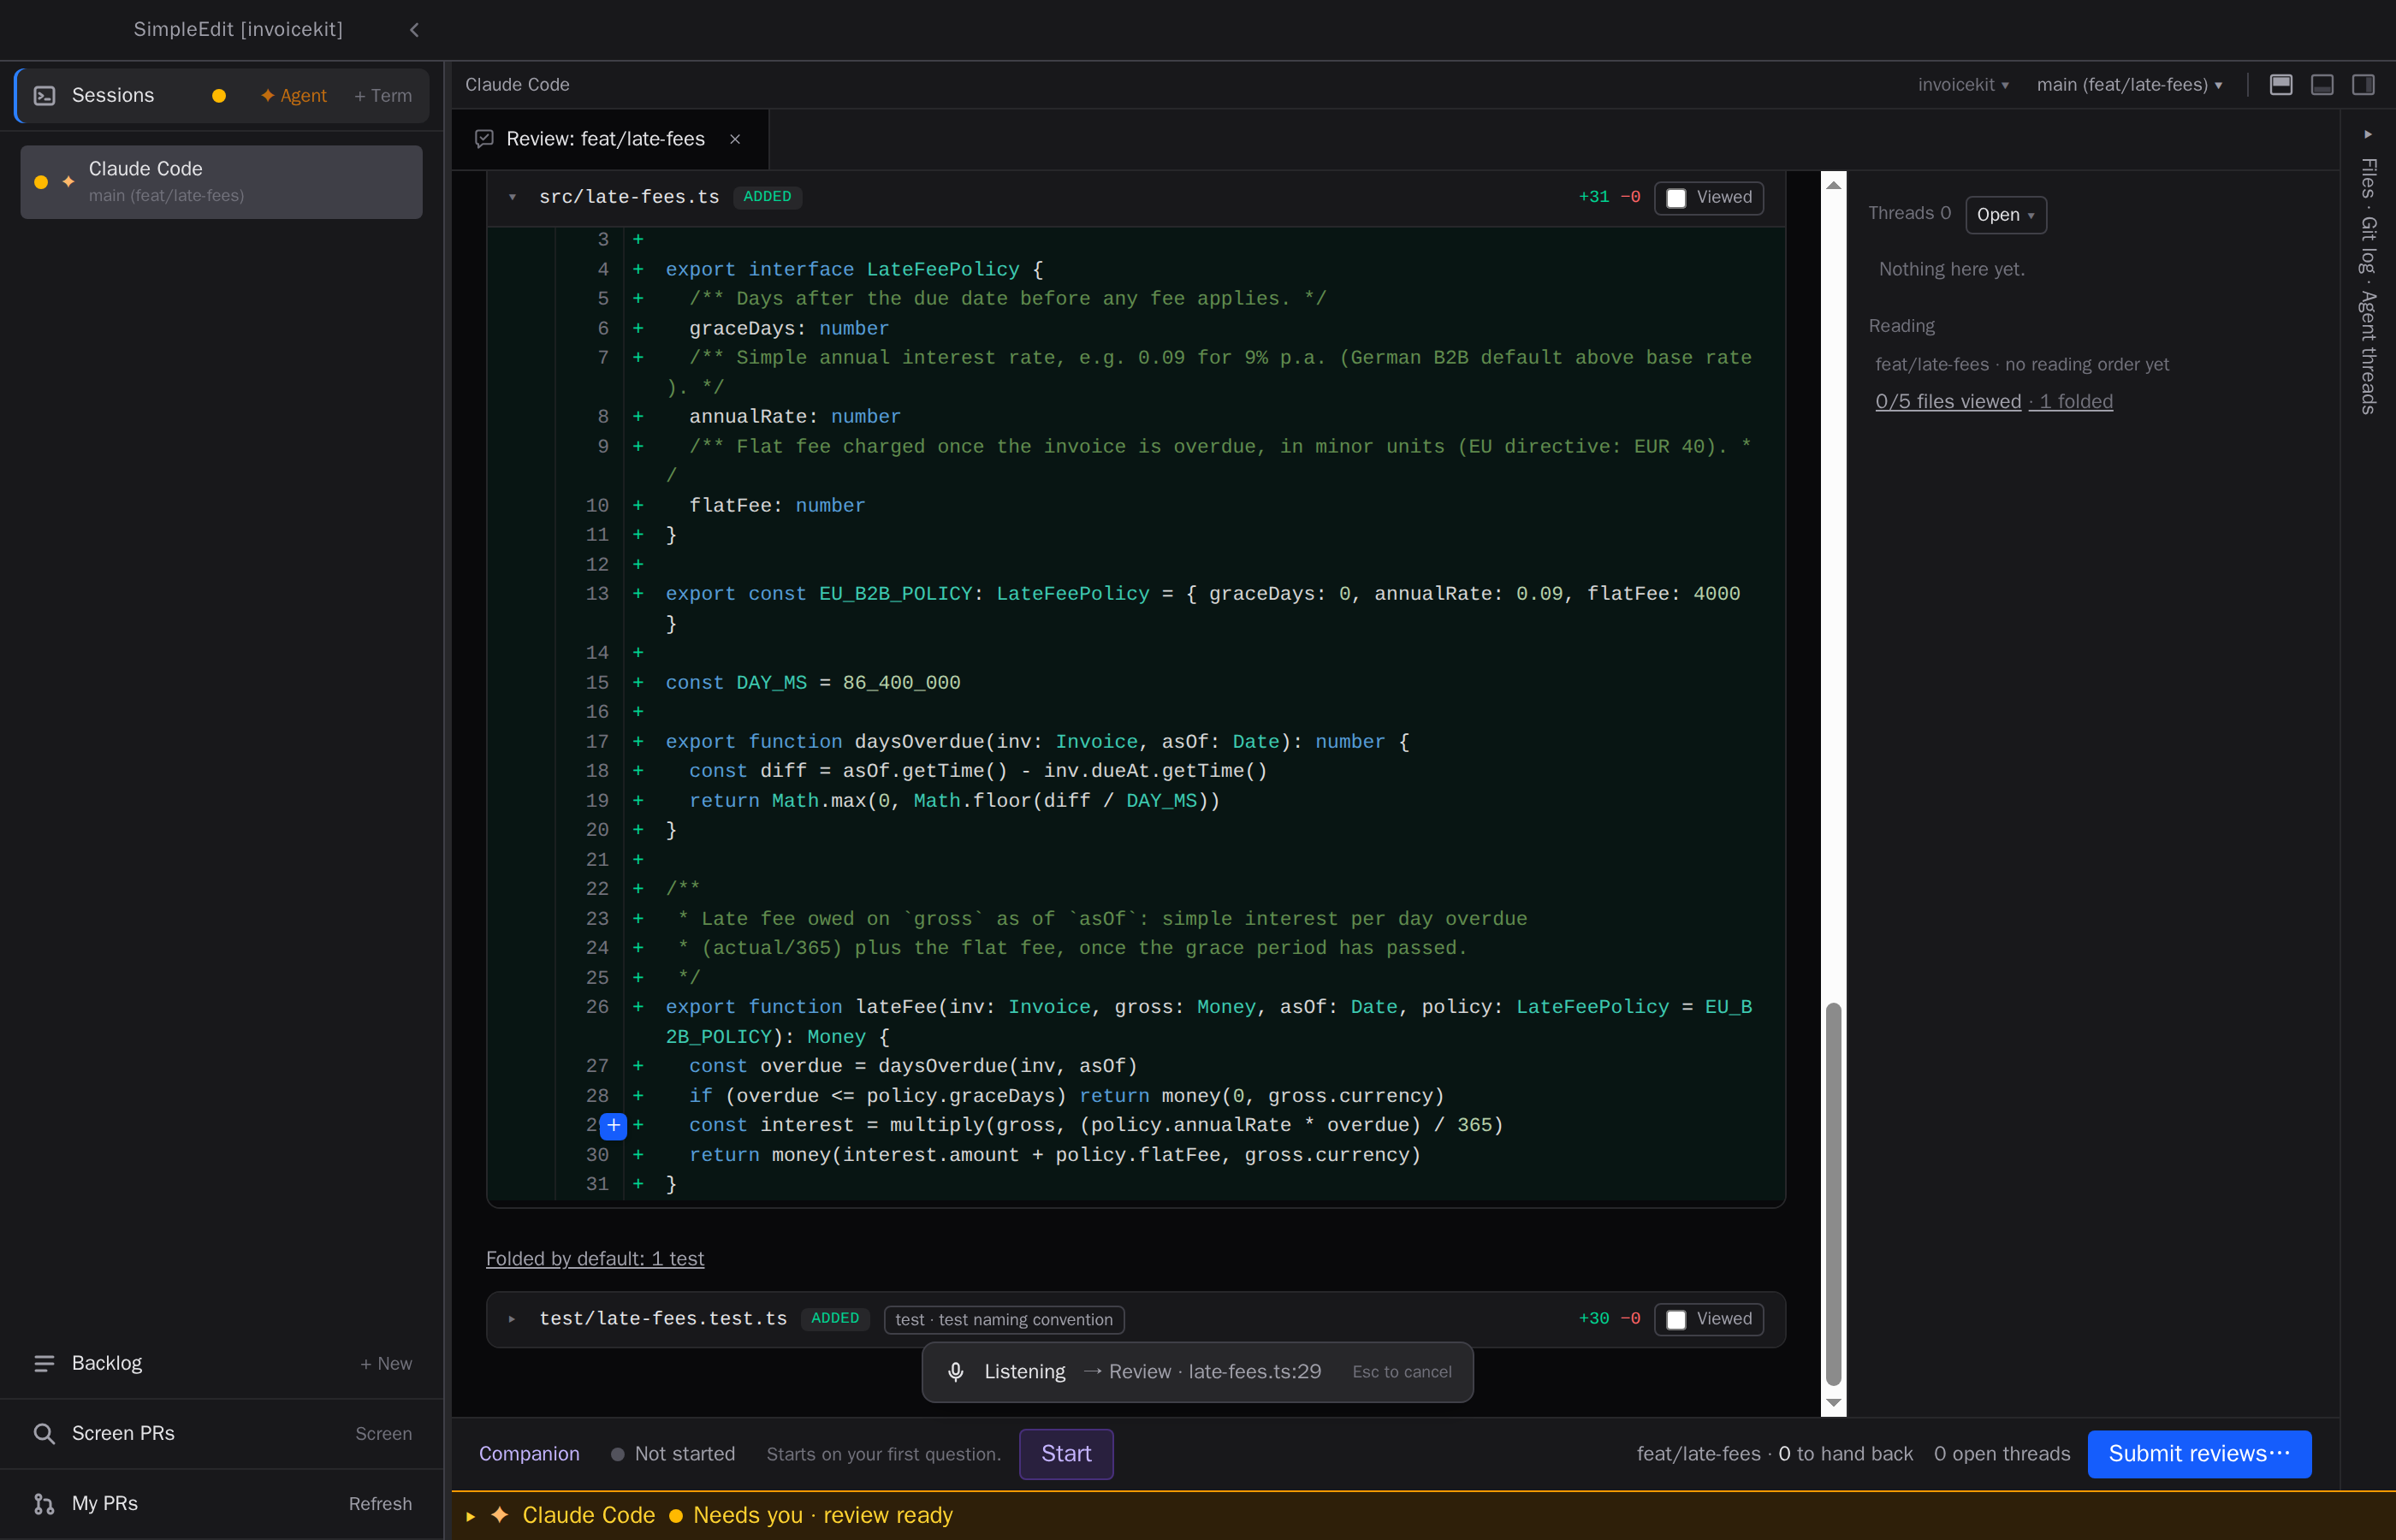
SimpleEdit finds the spot and opens the usual new-comment box there, with your words in it. Nothing goes to the Companion, the author or GitHub until you send it. Pick the recipient and send it, as you would a comment you typed. While the box holds your spoken words, Enter sends too and Shift+Enter starts a new line. Esc cancels.
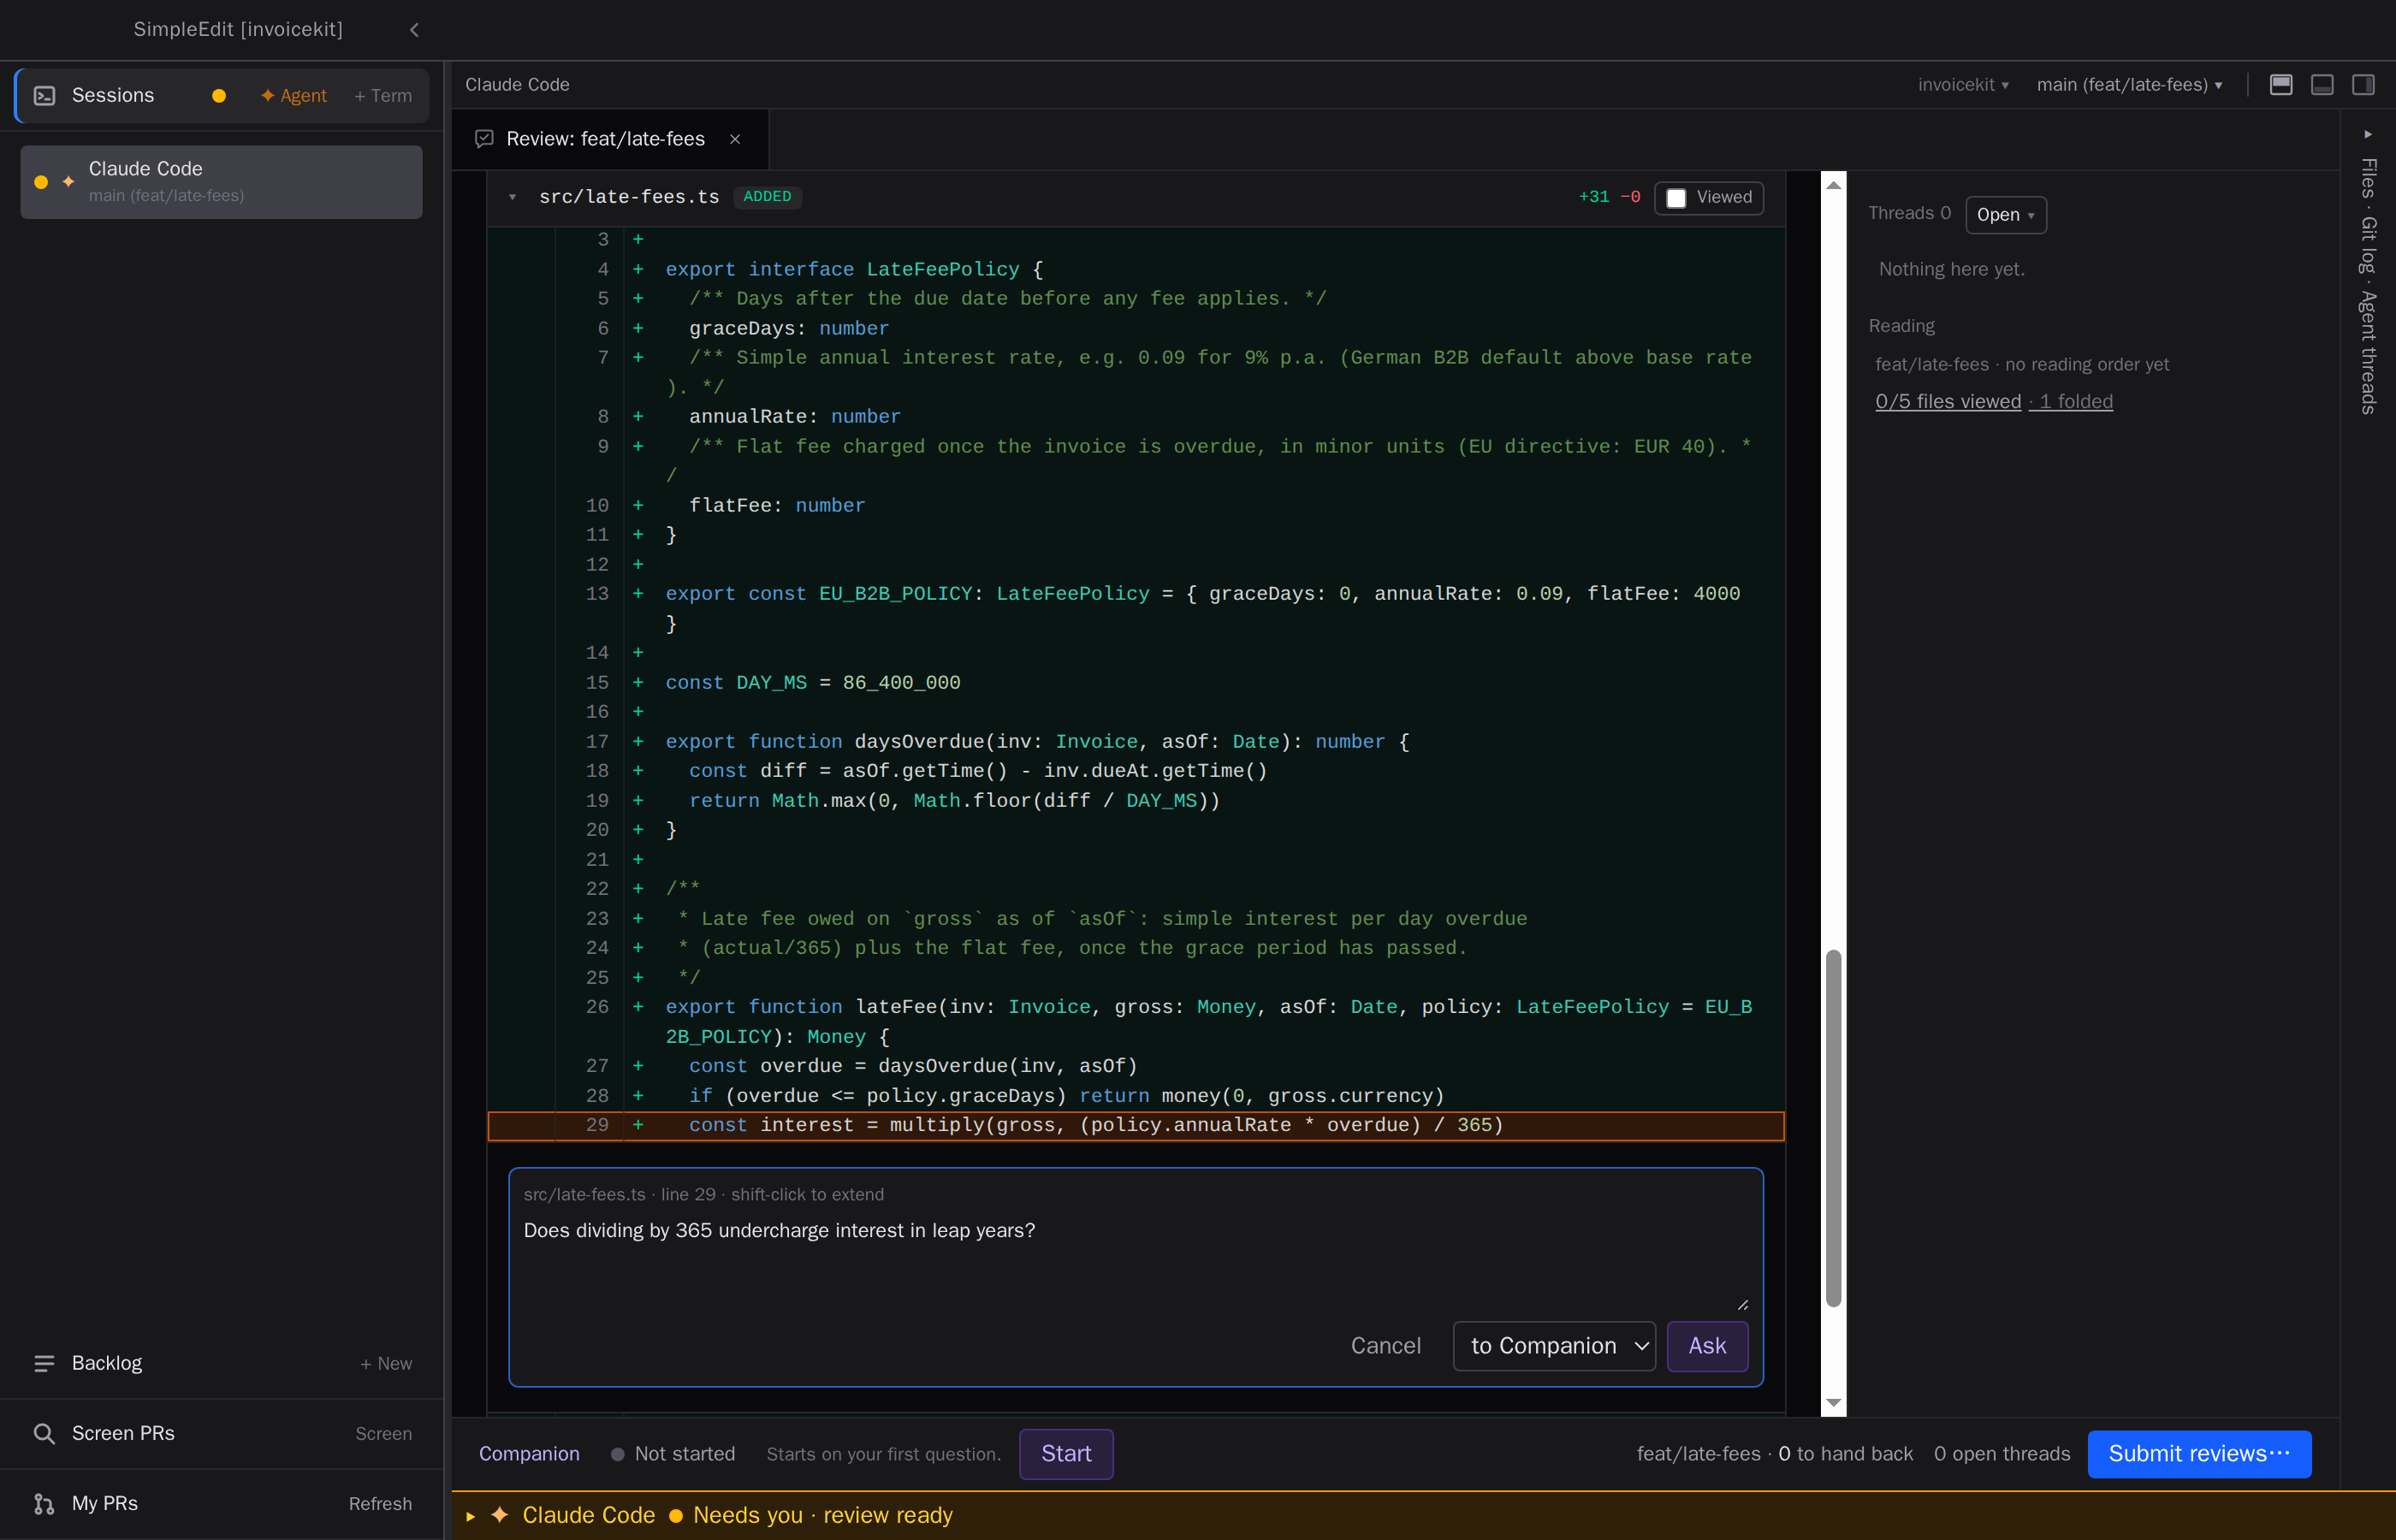
You can also name the place instead of pointing:
- A file: “In limit.ts, …”. For a name that is also an ordinary word, say the extension too: “settings dot ts”.
- A line: “line 40, …” or “lines 40 to 45, …”. On its own, a line number means the file you point at, or the one in the middle of the screen.
- The whole change: “this PR, …”. “Overall, …” works too when you aren’t pointing at a line.
The place you name is left out of the comment. English and German both work (“Zeile 40”, “der PR”).
When the spot is unclear
If SimpleEdit isn’t sure which line you mean, the bar asks Where should this go? It shows up to four lines, each with a number, and As a whole for a comment on the whole change.
- Press 1 to 4, or select a choice.
- Press Enter to take the first one.
- Click a line in the diff to put the comment there.
- Press Esc to drop it. Nothing is left behind.
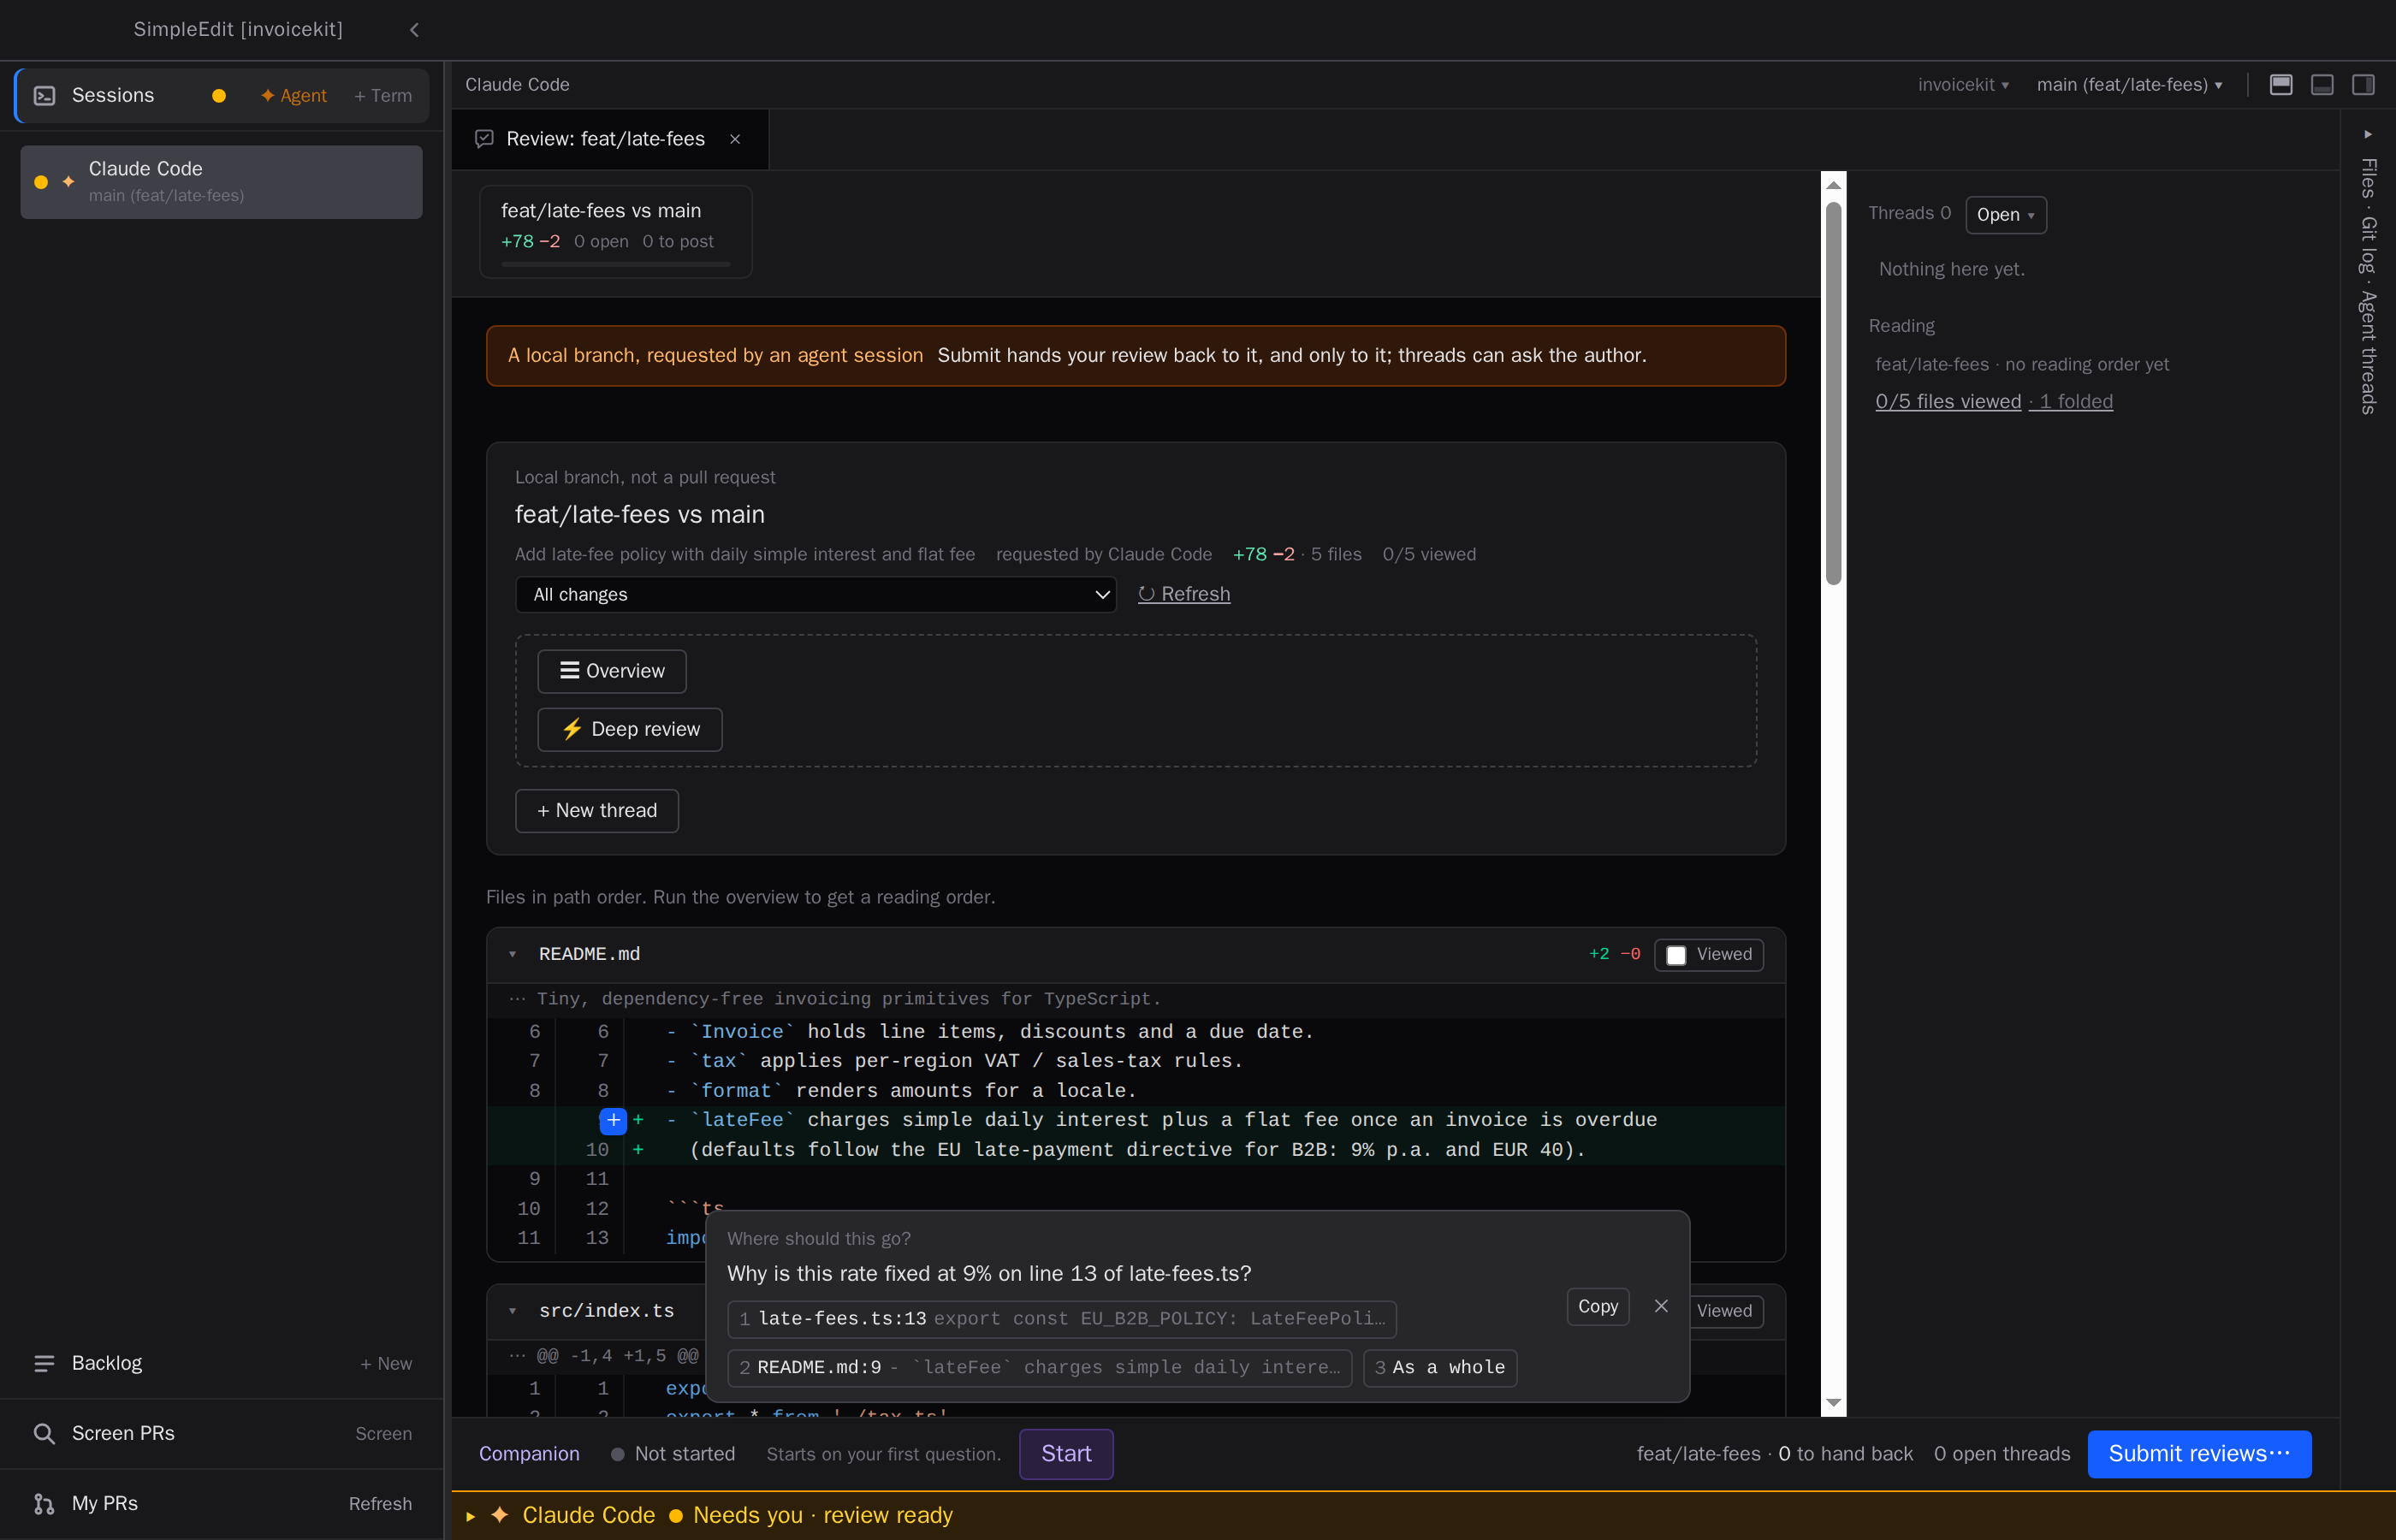
It also asks when you point at one line but name another. For example, “This duplicates line 45” could be about either line. To place a comment on a named line while pointing elsewhere, say the place first: “Line 45, is this right?”
If you set up a decision model, it puts the likeliest line first. It never picks the line for you.
If something goes wrong
- “Dictation isn’t set up yet”: whisper.cpp or the model is missing. Select Open voice settings.
- “Transcription failed”: whisper.cpp ran into a problem. The message says what it was.
- On Windows and Linux, pressing Alt on its own can open the window’s menu bar on some setups. If it gets in the way, pick another talk key.
Related
- Reviewing your agent’s work: the Review Room, the Companion and the author.
- Your agents on your phone